– Feature Article – Looking Good: Techniques for Finishing Your Car
– Pinewood Derby Car Showcase
– Memory – Final Race
– Q&A
Looking Good: Techniques for Finishing Your Car
By Randy Davis
(An update of an article originally published January 8, 2003)
Have you seen a car on the staging table that caused your jaw to drop from admiration? The paint job looks like it came right out of a custom body shop, and other details like decals and accessories look fabulous. You ask yourself: “How did they do that?”
I won’t kid you – I oftentimes ask that question as well. Clearly, some folks know how to take the finish work to a level beyond most of us. However, I can share with you some basic techniques for putting a nice finish on your car. The main tasks to be addressed are filling, sanding, priming, painting, and decal work.
Filling
It is very difficult to create a car of any intricacy without a gouge or nick that is too deep to sand out. For small defects, the simple cure is wood putty (or “Bondo” – a car body filler). Press enough of the product into the defect to completely fill the defect with some excess. If desired, you can smooth the putty with a finger dipped in tap water. Allow the putty to dry thoroughly. If the putty sinks or cracks, apply more putty and let it dry again.
For large defects (e.g., a hole drilled the wrong place), cut a piece of wood to fill as much of the defect as possible and glue it in place. After it dries fill any remaining voids with putty, and let it dry.
Next, it is time to proceed to …
Sanding
As you probably know, sanding involves smoothing the car, starting with a coarse grit paper and progressing towards a fine grit paper. A good grit progression is 60, 120, 240, and 400. This can of course vary, but the ultimate goal is to create a very smooth finish, free of defects and scratches.
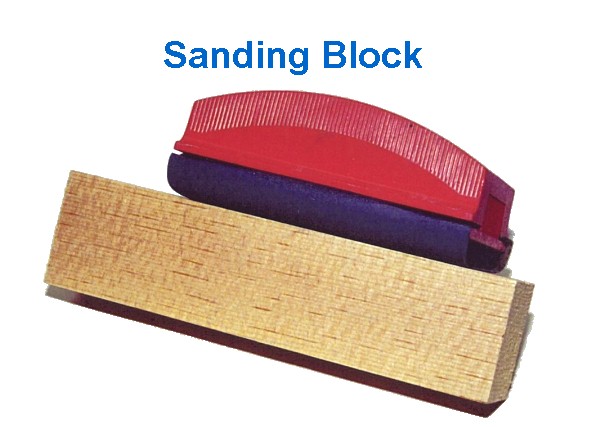
Sanding flat surfaces is greatly simplified by using a sanding block. A sanding block is designed to hold 1/4 of a sheet of standard sandpaper. It has a padded surface which helps make the finish very smooth. When selecting a sanding block, try to find one that can be easily held by your child (not too wide or heavy).
For sanding concave (inward curving) shapes wrap some sandpaper around a piece of wood (or your finger). A dowel rod or a piece of broom stick works well for sanding concave curves.
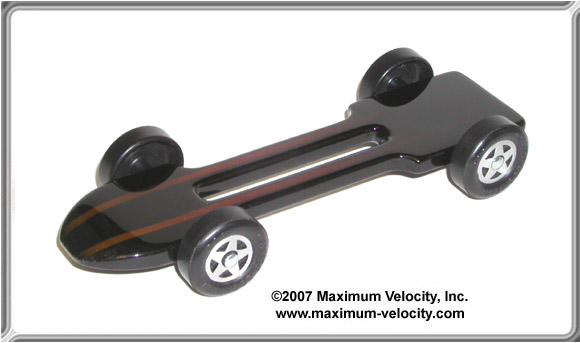
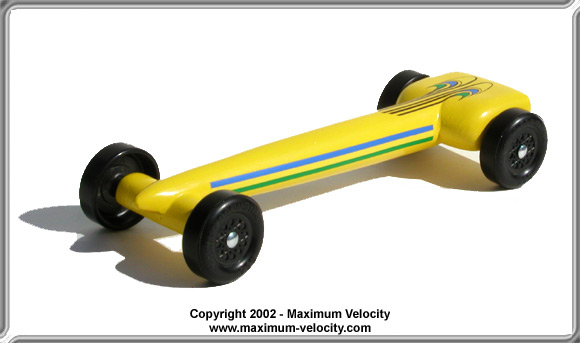
For convex (outward curving) shapes, use a sanding block, or just hold the paper in your hand and use fingertip pressure to sand the desired area.
After the sanding is complete, remove all dust with a vacuum and/or soft rag. Then create a handle for painting. Two alternatives include:
- Inserting a dowel rod into a weight hole
- Inserting a long wood/dry wall screw into the bottom of the car – you might be able to insert the screw into a weight hole so that the screw hole doesn’t show, but be careful to not go all the way through the car.
Next, I recommend masking off the axle slots (if you have axle holes, then insert round toothpicks into the holes. This makes future axle insertion much easier.
Painting – Priming
Before priming, locate a place for the car to dry. We have a piece of wire strung under a shelf in the shop, with some binder clips attached to the line. When we use a screw as a paint handle, the binder clip can be clipped to the screw, allowing the car to hang upside down to dry. If you use a dowel rod as a handle, drill an appropriate sized hole in a workbench, or in a heavy piece of wood. The dowel can then be fitted into the hole while the car dries.
When spray painting, make sure to wear eye protection and a breathing mask. Then cover the hand that will hold the car with a plastic bag, secured with a rubber band. Paint in a well-ventilated, dust and wind free location. Also watch out that the over spray doesn’t get on something important (cars, walls, etc.). We have large plastic garbage cans, so we flip up the lid and use it as a backdrop for painting. Optionally, a large box can be set on end to serve as a backdrop.
The selection of the type of primer is important. I have had the most success with a “high-build” or “filler-primer”, such as that offered by “Rust-Oleum” and sold at auto parts stores. This type of primer tends to fill in the pores of the wood, minimizing the number of primer coats required. If the sanding job is done well, generally three to four coats are sufficient.
When spraying the primer, keep the can moving and apply light coats. If you go too heavy, you will get runs that must be sanded out.
Let each primer coat dry, then sand with 600 grit paper and recoat. If you find a spot that doesn’t fill in well, you can apply a little wood filler or Bondo, sand, and continue priming. Once the car body is completely smooth, you can proceed to applying the color.
Painting – Color
There are many types and brands of spray paint. I strongly recommend acrylic lacquer paint such as “Dupli-Color – Perfect Match” (auto parts store item). This type of paint dries quickly, and can be recoated at any time. Watch out for brands that “can be recoated within 1 hour or after 24 hours”. What happens if you recoat after, say, three hours? Trust me on this one, you don’t want to know.
I also suggest avoiding enamel paints. Enamel paints generally take a long time (many days) to cure, are very susceptible to finger prints, and act like a graphite magnet.
Generally two or three color coats will be sufficient. After the last coat allow the car to dry thoroughly. Then proceed to adding decals, pin striping, etc., and finally apply clear coats.
Decorations
Decorations are certainly not required, but that can really dress up a car. They also have a practical use; they can cover up any defects in the paint job. We’ll discuss dry transfer decals, stick-on decals (includes stickers) and pin-striping. All of these products are available at Maximum Velocity.
Dry-Transfer Decals
Dry-Transfer decals are available in lots of designs, many of which are targeted at pinewood derby car builders.
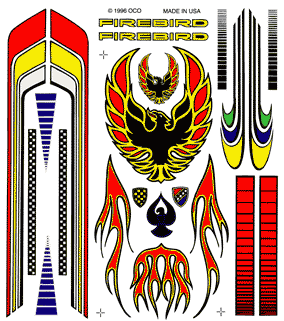
The best dry-transfer decals are very thin and do not have a clear edge. Thus, they blend in to the paint such that you have to look closely to see that the design is actually a decal.
To apply dry-transfer decals, cut out the desired design, place it on the car in the desired location, hold it down, and use a soft pencil with a rounded tip to scribble over the entire decal (you will actually be scribbling on the transfer material, not the actual decal). After scribbling over the entire decal, carefully lift up on the transfer material. If the decal is not completely detached from the transfer material, scribble some more and try again. After the transfer material is removed, take the provided tissue-like paper and rub it over the entire decal.
Stick-on Decals
Stick-on decals, as well as stickers are also good choices. These apply much easier than dry-transfer decals, but make sure you put it where you want it. As you know, stickers like to attach themselves where you don’t want them!
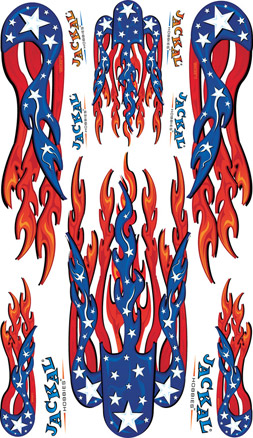
My daughter used stickers to decorate her Diamondbacks car; she found the stickers at a team shop. I believe that team stickers exist for every professional team, as well as most college teams.
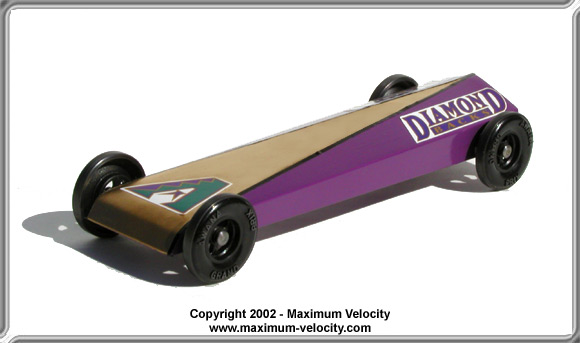
Home Made Stickers
Can’t find what you want, or on a budget? Make your own stickers! Find a photo, a logo, or most anything on paper. Cut it out, apply some glue, and place it on the car.
Pin Striping
I am a big fan of pin striping; it is relatively inexpensive, easy to apply, and can really dress up a car. Pin striping is long, thin, colored tape that has an adhesive backing. It adapts well to curves in the car and can be mixed and matched, both in color and in width.
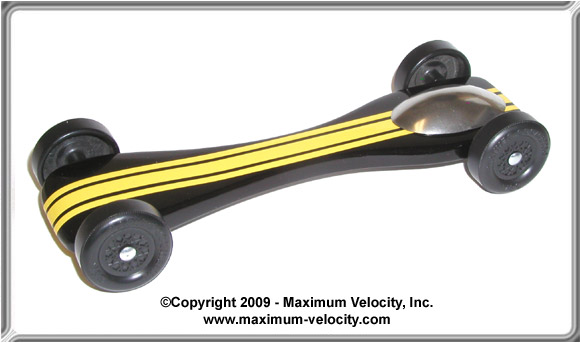
To apply pin striping, unroll a piece longer than you need, pull it taut and then apply it to the car. Use a piece of tissue paper (not Kleenex, but the kind used in gift bags) to press down on the pin striping. This will eliminate any air bubbles and ensures that it is pressed down well. After the pin striping is in place, trim the excess off the ends with a sharp knife (hobby knife or razor knife). If the pin striping will be placed on the front and/or back of the car (as in Figure 7), wrap the pin striping under the car and trim it off underneath. This makes for a much cleaner finish.
Finish Coat
All decorated? Now it is time to protect your investment and give a deep glossy look. Applying multiple clear coats will not only improve the appearance, but will (mostly) protect the car from finger prints, graphite and minor scratches. Make sure to select a clear coat that is compatible with the paint you used. If you used Dupli-Color for the color, then use Dupli-Color Clear Coat. I recommend at least five coats of clear. Fortunately it dries very quickly, so you can apply the coats in a fairly short period of time.
Conclusion
I have barely covered this subject as there are certainly other options for painting and decorating your car. If you have a technique you would like to share, please send it to me, and I’ll try to include a number of reader ideas in a future article.
Pinewood Derby Car Showcase
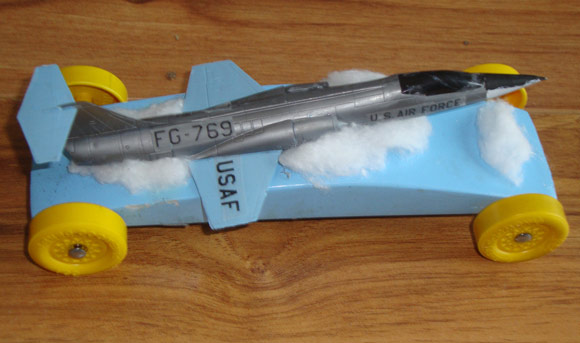
Starfighter – Thomas Stein
This car is called “Starfighter”, and sports a Tamiya 1/100 scale F-104 Starfighter. We used a coping saw to cut the block, and a battery-powered high-speed rotary tool to make a channel for the plane to rest in. It’s glued in place with Gorilla Glue. We used the Pro Body Tool, Wheel Bore Polish, Wheel Alignment Tool, and Pro-Axle Guide to tune up the car.
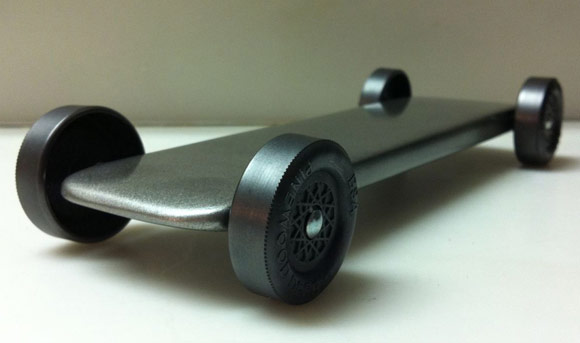
Midnight – Robert Berry
This is my son, Sammy’s car, which he made after testing different shapes in a wind tunnel for his science fair (patterned after a wind tunnel featured in a previous Pinewood Derby Times article). The car is smooth on the bottom and mostly hollow. He took first place in the science fair and also first place in our Pack race. Unfortunately there was no District or Council race for him to compete in.
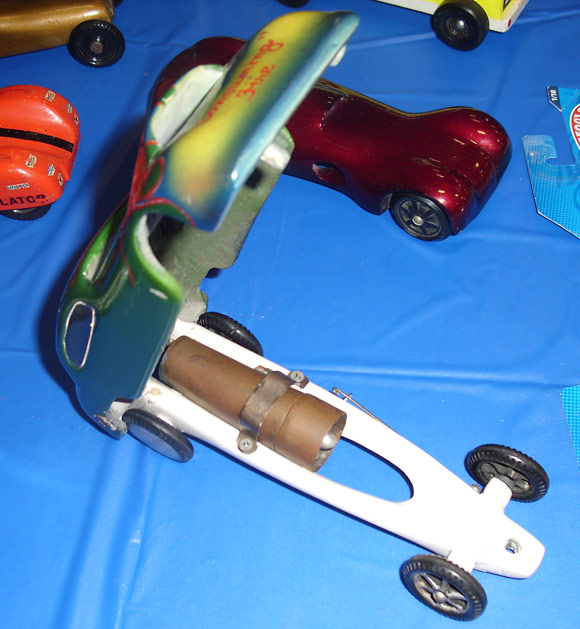
Mini-Turbine Cars – Joe Bilyeu
I came across some unusual cars which have mini-turbine engines. My friend Russ and his brother, who worked for Rockwell on the Atlas program, built and designed these cars. I took them to our pack derby race and the boys loved them. The engines have turbine fans at the front and rear, with solid fuel in the middle.
Pinewood Derby Memory
Final Race
As the assistant Cubmaster for our Pack, I decided our old beat up track needed to be improved. So I took it upon myself to build a new one knowing that my son, a new Tiger Cub, and my nephews would benefit from it for years. My son and I worked on his Pinewood cars, Raingutter boats, and Space Derby rockets and never placed in any race — although it was fun just competing. When my son was in Webelos II, his den had trickled down to only five boys and my son was sure this would be his year to win a trophy. We gave out trophies for four places; my son took 5th by .003 seconds, and was naturally disappointed.
I had always used the same trophy dealer for all of our events, and after my son’s last defeat I had to go to the trophy shop to place a different order for the scouts. I related my son’s final defeat to the owner of the shop. A week later when I went to pick up the trophies, she had made a special “participant” trophy for my son. He is now in High School, and competing in various sports and earning trophies. However, the Cub Scout trophy is still one of his favorites and has a prominent place on his shelf.
Rick Wold, Pack 457; Covina, California
Q&A
We must use the same axle spacing that the Cub Scouts recommend. I plan to drill axle holes. How far from the back do you start your axles?
If you have to use the exact BSA axle placement, then the rear axle is set at 15/16 inch from the back of the block, and the front is set at 4-3/8 inches in front of the rear axles. However, if you must use the standard distance between axles, but can shift the wheelbase, then set the rear axles at 11/16 inch and the front axles at 4-3/8 inches in front of the rear axles.
Our rules state that wheels cannot be smaller than 1.18 inches in diameter (or they are considered mass reduced wheels). Raw wheels are about 1.182 to 1.183 in diameter out of the package. Do you have “speed wheels” that meet the 1.18 specification?
The rules of many packs have not been modified to account for the smaller wheel size (introduced in 2009). The older raw wheels were over 1.19 in diameter, so a 1.18 specification was reasonable. With the new wheels, a 1.18 specification means that the wheels must be left raw, or just barely touched.
I recommend verifying the rules with your race leadership. They may be unaware of the change, or they may want to severely limit wheel work. In Arizona (where we are located), the Council rules were changed to 1.17 to account for the smaller wheels.
All of the speed wheels we offer will meet a 1.17 spec. To make a speed wheel that meets the 1.18 spec, you would have to buy a large quantity of wheels and search for a few that were virtually perfect to start with. This is, of course, not practical.
Want Answers?
Do you have a pinewood derby-related question? If so, e-mail us your question.We answer all questions by e-mail, but not every question will appear in the Q&A section of the newsletter.
Back Issues
Are you a new subscriber, or have you missed some of the previous newsletters? Don’t miss out; all of the issues for Volume 5 through Volume 17 are posted on our web site.
Newsletter Contributions
We welcome your contributions. If you would like to contribute an article, a web site review, a speed tip, or a pinewood derby memory, please e-mail us.
Subscription Information
The Pinewood Derby Times is a free e-newsletter focused on pinewood derby racing. It is published biweekly from October through March.
If you haven’t already done so, please forward this issue to your pinewood derby friends. But please don’t subscribe your friends. Let them decide for themselves. Thanks.
If this newsletter was forwarded to you, why not subscribe to receive this newsletter. There is no cost, and your e-mail address is safe, as we never sell or share our distribution list.
To subscribe, send a blank e-mail to
[email protected]
You will receive a confirmation e-mail. Reply to the confirmation e-mail and you will start receiving the Pinewood Derby Times with the next issue.
Randy Davis, Editor, Pinewood Derby Times
E-Mail: [email protected]
(C)2018, Maximum Velocity, Inc. All rights reserved. Please do not reprint or place this newsletter on your web site without explicit permission. However, if you like this newsletter we grant permission, and encourage you to e-mail it to a friend.
Maximum Velocity disclaims any personal loss or liability caused by utilization of any information presented in this newsletter.
The Pinewood Derby Times is not specific to, and is not affiliated with the Boy Scouts of America, YMCA, Awana, or any other organization.
(R)Maximum Velocity is a registered trademark of Maximum Velocity, Inc.
(R)Pinewood Derby is a registered trademarks of the Boys Scouts of America.
(R)Awana is a registered trademark of Awana Clubs International.
All other names are trademarks of their respective owners.

