
Standard Sports Car


Extended Sports Car
|
Standard Sports Car |
|
Extended Sports Car |
|
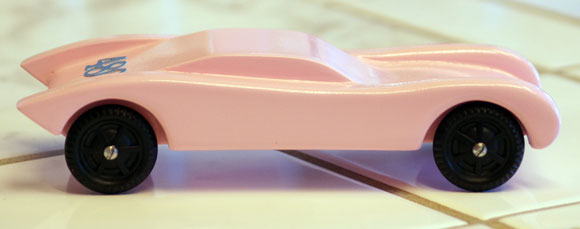
Editor's Notes Please include your full name. If selected, we will include the photo and description in this newsletter.  Photos must be sent by e-mail in JPG format (minimum size of
640x480, maximum size of 1280 x 960). Please shoot photos from the
front left of the car, similar to the orientation of this car.
Photos must be sent by e-mail in JPG format (minimum size of
640x480, maximum size of 1280 x 960). Please shoot photos from the
front left of the car, similar to the orientation of this car.
Make sure the photo is not blurry. If your photos are blurry, try holding the camera four or five feet away from the car, and then use the camera's zoom to fill the frame with the car. Also, use a solid (preferably white) background for the photo. Send only one photo per car, unless an additional photo is needed to adequately show a feature. Don't forget to include your name, the name of the car (if it has one), and a brief write up on any design features, inspiration for the design, and how the car performed at the race. Thanks. |
|
 
If you are planning a race and are not required to use a specific kit type, our MV Basic or Wedge Car Kit are just what you need. These attractively priced kits are equipped with:
|
Where will the weight go? Depending on how much wood you remove,
you will likely need to add between 2.5 to 3.5 ounces of weight. Too
often car builders don't consider the need to add weight until after
the car is shaped and painted. The time to deal with the weight is
now, before cutting the block. So, figure out what kind of weight you
will be using and where it will go.
Speaking of where the weight will go ...
Does the design allow the weight to be placed near the rear axle? For best performance most people recommend locating the center of gravity of the car at 3/4 to 1 inch in front of the rear axle. To accomplish this, you will need to place 1/3 to 1/2 of the weight behind the rear axle.
 If you are using axle slots, prepare them by pre-inserting a spare
nail in each slot position, then twist and pull it out with a pair of
pliers. This is more accurately accomplished with a Pro-Axle Guide1,
or better yet, a Pro-Body Tool2 will accurately pilot drill the
slots.
If you are using axle slots, prepare them by pre-inserting a spare
nail in each slot position, then twist and pull it out with a pair of
pliers. This is more accurately accomplished with a Pro-Axle Guide1,
or better yet, a Pro-Body Tool2 will accurately pilot drill the
slots.
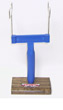 The car is now ready to paint. A Paint Stand3 is a great tool, but
if you don't have one I recommend inserting a long cabinet screw into
the bottom of the car (screw it into a weight pocket if present) as a
painting handle. The screw only needs to go deep enough to be firmly
in place. Be careful not to run the screw completely through the car!
Next, insert round toothpicks in the axle slots/holes. Now locate a
place in a dust-free, shaded area where you can hang the car while it
dries. In this location hang a short wire between two nails or screws
such that the car can be suspended from the wire without touching a
wall or other object.
The car is now ready to paint. A Paint Stand3 is a great tool, but
if you don't have one I recommend inserting a long cabinet screw into
the bottom of the car (screw it into a weight pocket if present) as a
painting handle. The screw only needs to go deep enough to be firmly
in place. Be careful not to run the screw completely through the car!
Next, insert round toothpicks in the axle slots/holes. Now locate a
place in a dust-free, shaded area where you can hang the car while it
dries. In this location hang a short wire between two nails or screws
such that the car can be suspended from the wire without touching a
wall or other object.
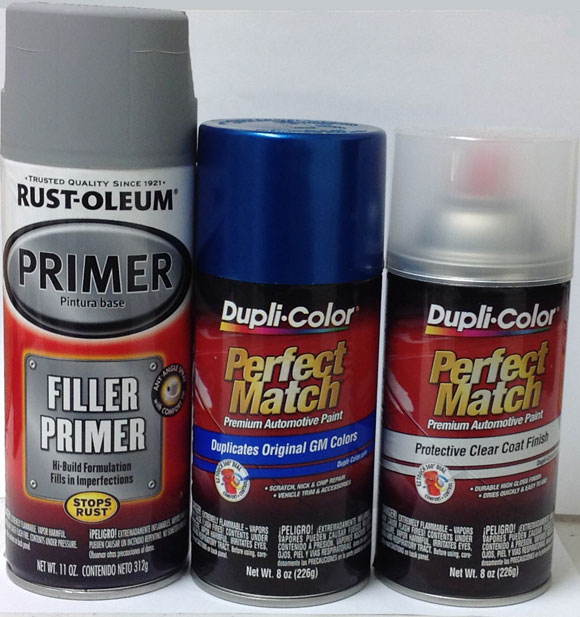 Paint the car following the recommendations on the paint can. For
spray painting, I recommend starting with five coats of Rust-Oleum
brand Filler Primer.4 After the primer dries, sand the car smooth
with 800 grit wet paper. Then apply two coats of Dupli-Color-brand
Perfect Match paint.4
Paint the car following the recommendations on the paint can. For
spray painting, I recommend starting with five coats of Rust-Oleum
brand Filler Primer.4 After the primer dries, sand the car smooth
with 800 grit wet paper. Then apply two coats of Dupli-Color-brand
Perfect Match paint.4

|
Tungsten Bars $2.00 off |
|

 Which of your axles meet the BSA national Pinewood Derby guidelines
and come deburred and polished?
Which of your axles meet the BSA national Pinewood Derby guidelines
and come deburred and polished?
 Some other sites recommend graphite lube with "moly." What do you
think? Is graphite with moly a superior product?
Some other sites recommend graphite lube with "moly." What do you
think? Is graphite with moly a superior product?
 I bought your Axle Polishing Kit. I tried to follow your directions
but it's hard to break habits. For example, the instructions said to
polish for "at least 10 seconds". Well, I did at least 110 seconds per
grit. My thinking was there's no way 10 seconds could do the same job
as hours did with my oldest son's car. That car won, but time is
tighter this year. Did I waste time by working the axles more than 10
seconds per grit? Can I get away with just 10 seconds and get same
results?
I bought your Axle Polishing Kit. I tried to follow your directions
but it's hard to break habits. For example, the instructions said to
polish for "at least 10 seconds". Well, I did at least 110 seconds per
grit. My thinking was there's no way 10 seconds could do the same job
as hours did with my oldest son's car. That car won, but time is
tighter this year. Did I waste time by working the axles more than 10
seconds per grit? Can I get away with just 10 seconds and get same
results?
